 Fuck Each Other Not The Planet Unisex
 Wear My Kink
BDSM Furniture Building Plans (10 Amazing Plans You Can’t Miss)
BDSM is not only about the experience, it’s also about creating an environment that is both evocative and functional. Whether you’re a seasoned DIY enthusiast or new to the world of kink, crafting your own BDSM furniture can be a transformative journey. This comprehensive guide covers everything from planning and safety to detailed, step-by-step instructions for building a St. Andrew’s Cross, a Spanking Bench, and a BDSM Cage. Designed specifically for the modern millennial with a passion for fetish, kink, and creative self-expression.
Explore Our Collection of Easy to Follow BDSM Furniture Plans

Adjustable BDSM Spanking Bench Plans
Ready to stop improvising spanking furniture and build something that can actually handle your scenes? These Adjustable BDSM Spanking Bench Plans show you exactly how to create a sturdy, custom bench for your play space.
You Will Learn How To:
- Build a stable safe bench for spanking and impact play
- Cut, assemble and adjust the frame with clear, simple steps
- Add anchor points, padding and finishes that fit your style
Whats Inside: step by step build instructions, tool and materials lists, diagrams, safety tips and ideas for padding and finishes that suit your kink.
Perfect For: couples and kink fans who want real bondage furniture, built to their own size, budget and fantasies.

BDSM Table Pillory Plans
Want a proper pillory without bolting hardware into your dining table forever? These BDSM Table Pillory Plans show you how to build a solid, removable pillory top that clamps to your table, then hides away when guests arrive.
You Will Learn How To:
- Build a stable pillory that sits securely on a table
- Cut and assemble the frame using clear, simple steps
- Add adjustable neck and wrist openings, padding and finishing touches
Whats Inside: full DIY blueprint, cut lists, tool and materials lists, step by step diagrams, safety tips and ideas for lining, padding and dungeon worthy finishes.
Perfect For: kinky couples and creators who want serious bondage furniture, no permanent drilling and a play space that looks as intense as it feels.

BDSM Straddling Spank Bench Plans
Ready to stop improvising spanking positions on beds and chairs These BDSM Straddling Spank Bench Plans show you how to build a solid, straddle friendly bench that actually fits your scenes.
You Will Learn How To:
- Build a stable straddling bench for spanking and impact play
- Cut and assemble the frame with clear, simple steps
- Add anchor points, padding and finishes that suit your style
Whats Inside: step by step build instructions, tool and materials lists, cut diagrams, safety checks and ideas for upholstery and dungeon worthy finishes.
Perfect For: kinky makers and couples who want serious spanking furniture, built to their own size, room and fantasies.

Padded St. Andrew’s Cross
Stop dreaming of the ultimate dungeon centerpiece and start building it. The St. Andrew’s Cross is the iconic symbol of authority and surrender, and these plans show you how to create a professional-grade, foldable version that fits your home perfectly. No more worrying about stability, build a frame that handles every scene with confidence.
You Will Learn How To:
- Construct a rock-solid X-frame using 4x4 timber for maximum stability
- Install a heavy-duty folding mechanism for easy storage when not in use
- Apply high-density foam and marine-grade vinyl for a premium, easy-to-clean finish
- Position heavy-duty eyelets for secure and versatile limb restraint
Whats Inside: Detailed blueprints, a comprehensive timber and hardware list, step-by-step assembly guides, and professional upholstery tips for a high-end look.
Perfect For: Dedicated kinksters who want a classic, imposing piece of furniture that can be tucked away when the scene is over.

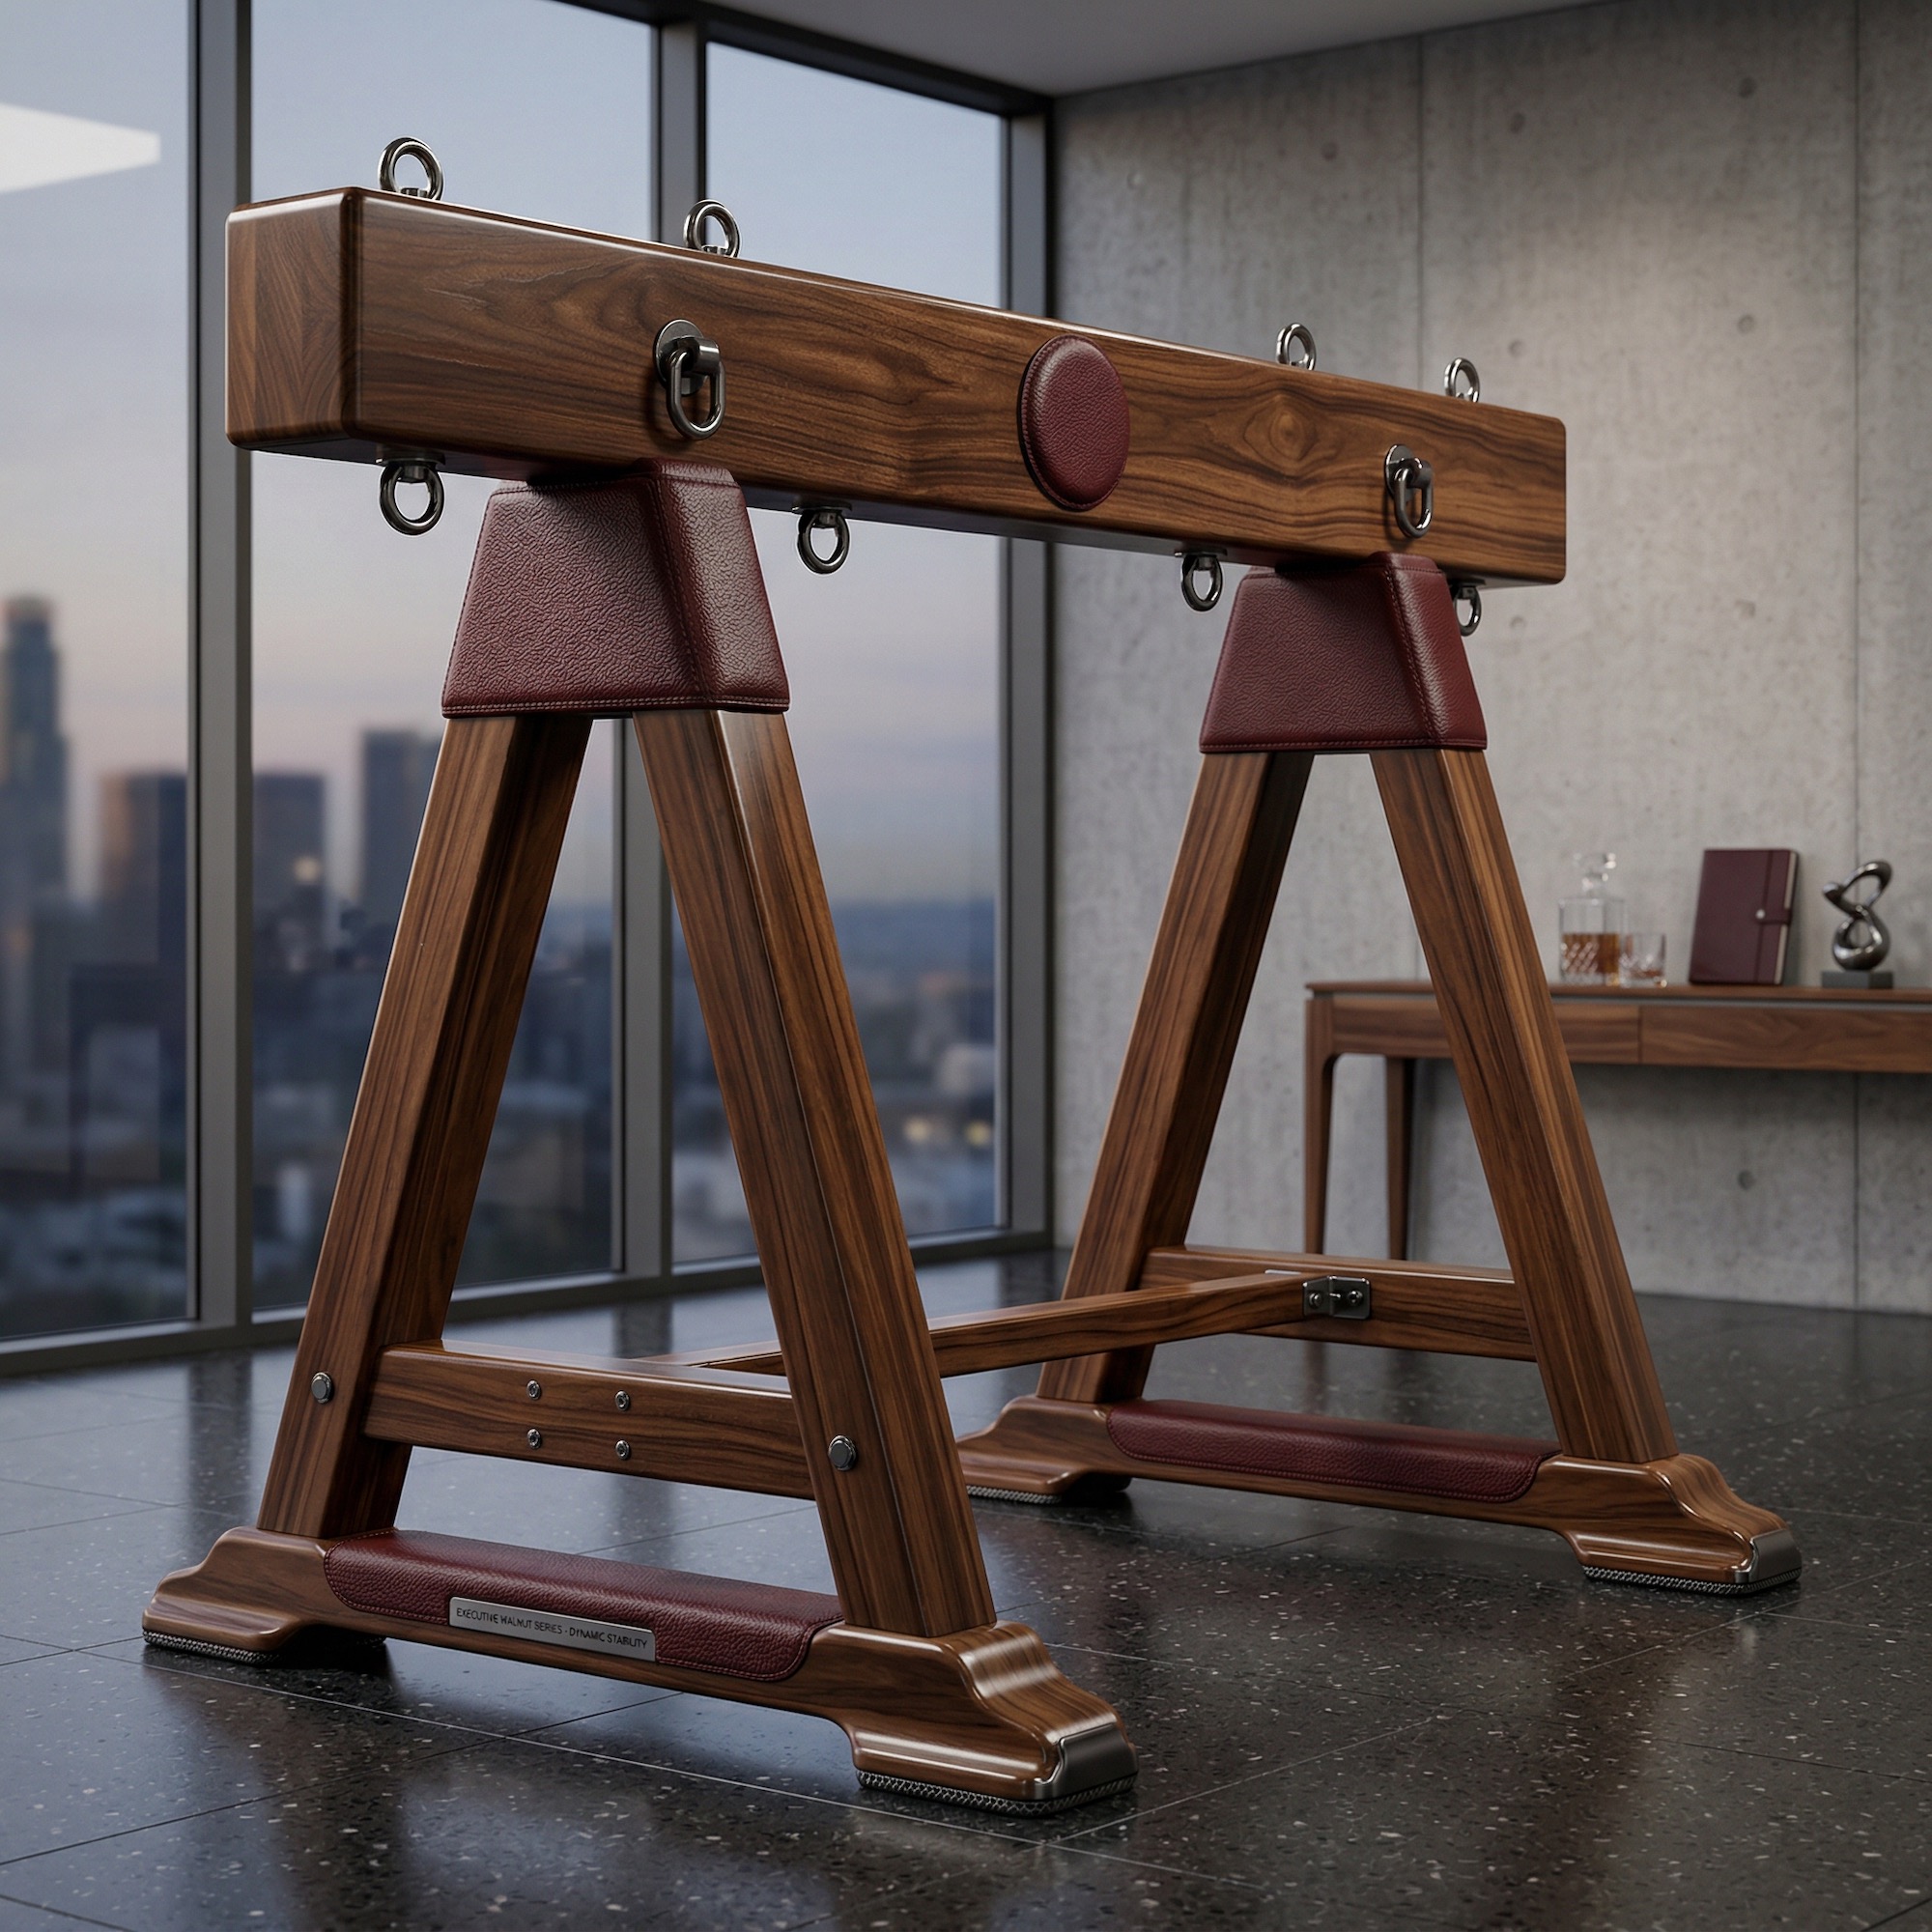
Bondage Sawhorse
Elegant in its simplicity and unmatched in its versatility, the Bondage Sawhorse is the "Swiss Army Knife" of kink furniture. These plans guide you through building a sturdy, trestle-style seat that looks like a professional piece of kit but can be built with basic tools and standard lumber.
You Will Learn How To:
- Create a wide-base frame that guarantees zero-wobble during play
- Pad the "spine" of the horse for long-term comfort during scenes
- Install D-ring anchor points for secure under-the-body tie-offs
- Master basic carpentry joints for a sleek, professional aesthetic
Whats Inside: Beginner-friendly diagrams, a standard lumber shopping list, and creative ideas for custom tie-off configurations.
Perfect For: Hobbyists looking for their first major build that offers endless possibilities for bondage and restraint.

Pelvic Sling Frame
Experience the weightless sensation of a sling without ever having to drill a hole in your ceiling. This freestanding Pelvic Sling Frame uses a reinforced "portal" design to provide a rock-solid foundation for suspension play. It’s the ultimate way to bring dynamic, weight-bearing play into your home safely.
You Will Learn How To:
- Engineer a "portal" frame with reinforced corners for dynamic weight capacity
- Determine the perfect height for versatile suspension and activity
- Assemble a freestanding unit that doesn't require permanent wall or ceiling mounts
- Choose the right hardware to support heavy-duty slings and straps
Whats Inside: Load-bearing construction tips, hardware specifications, safety-first assembly steps, and adjustment guides.
Perfect For: Renters or homeowners who want the thrill of suspension play with the freedom of a portable, freestanding unit.

The M Frame
Designed for the art of surrender, the "M" Frame provides a stable, comfortable leaning point for flogging and sensation play. Forget the hazards of leaning over unstable sofas or tables, this frame is built to keep the receiver perfectly positioned and the donor in total control.
You Will Learn How To:
- Assemble the signature "M" silhouette for ergonomic forward-leaning play
- Use wing-nut hardware to make the frame fully portable and easy to store
- Ensure maximum stability for spread-leg positioning
- Finish the central bar for comfort and safety during long scenes
Whats Inside: Step-by-step instructions, a portability hardware guide, and safety tips for forward-leaning restraint.
Perfect For: Fans of flogging and sensation play who need a stable, portable frame that can travel wherever the scene takes them.

Padded Bondage Ottoman
Master the art of "Stealth Kink" with a piece of furniture that hides its true purpose in plain sight. This Padded Bondage Ottoman looks like a high-end living room piece but features hidden anchor points and toy storage. It’s the perfect solution for the kinkster who values discretion without sacrificing functionality.
You Will Learn How To:
- Construct a heavy-duty plywood box frame that doubles as a sturdy seat
- Install discrete "pop-up" or hidden anchor points for restraints
- Build a hollow interior for secure, out-of-sight toy storage
- Apply professional upholstery techniques for a "store-bought" look
Whats Inside: Stealth design blueprints, upholstery guides, hardware hiding tips, and storage compartment plans.
Perfect For: Beginners who want a fully functional dungeon piece that can live in their living room without raising an eyebrow.

Spanking Chair Insert
Turn any sturdy dining chair into a professional spanking station in seconds. This clever Spanking Chair Insert is the ultimate space-saver, providing a raised, angled platform and integrated wrist restraints without the need for a full-sized bench. High utility meets low footprint.
You Will Learn How To:
- Build a custom-fit platform that secures safely to standard chairs
- Create an angled "booster" for the perfect impact play positioning
- Integrate adjustable locking arms and wrist restraint points
- Finish the wood and padding for comfort and hygiene
Whats Inside: Scaling guides for different chair sizes, assembly diagrams, and padding instructions.
Perfect For: Urban dwellers or those with limited space who want a professional play experience on a budget.

High-Back Restraint Chair
Make a statement with a High-Back Restraint Chair that functions as both a stunning centerpiece and a formidable tool of control. This modern take on a classic design features integrated strap slots and an angled seat for total security. It’s where form meets absolute function.
You Will Learn How To:
- Cut and assemble a tall backrest with precision slots for restraint straps
- Build a wide, anti-tip base using thick plywood panels
- Engineer an angled seat to keep the receiver securely in place
- Sand and finish the piece for a high-end, "boutique" dungeon aesthetic
Whats Inside: Full-scale templates for strap slots, structural bracing guides, and finishing tips for a professional look.
Perfect For: Builders who want a visually striking piece of furniture that commands attention and offers total restraint.

Freestanding Suspension Beam
Want a proper pillory without bolting hardware into your dining table forever? These BDSM Table Pillory Plans show you how to build a solid, removable pillory top that clamps to your table, then hides away when guests arrive.
You Will Learn How To:
- Build a stable pillory that sits securely on a table
- Cut and assemble the frame using clear, simple steps
- Add adjustable neck and wrist openings, padding and finishing touches
Whats Inside: full DIY blueprint, cut lists, tool and materials lists, step by step diagrams, safety tips and ideas for lining, padding and dungeon worthy finishes.
Perfect For: kinky couples and creators who want serious bondage furniture, no permanent drilling and a play space that looks as intense as it feels.

Floor Piercing Bench
Master the art of floor-based play with a bench designed for total stability and safety. The Floor Piercing Bench sits low to the ground, providing the dominant partner with total control and the receiver with a rock-solid, grounded experience. It’s the safest "starter" piece for any new builder.
You Will Learn How To:
- Build an ultra-wide, stable base with a low center of gravity
- Create a minimalist padded top designed for comfort and accessibility
- Ensure the frame can handle intense impact without shifting
- Apply finishes that are durable and easy to sanitize
Whats Inside: Simple assembly diagrams, material lists, and tips for "low-profile" padding techniques.
Perfect For: Beginners who want to build their first piece of play furniture with total confidence in its strength and safety.

The Kneeling Prayer Box
Explore the psychology of fixed positions with The Kneeling "Prayer" Box. This piece is designed to hold the receiver in a deep, submissive kneel, resting their weight on a padded top. It’s an architectural masterpiece that challenges the body and the mind in equal measure.
You Will Learn How To:
- Construct a reinforced three-sided box with precision joints
- Build adjustable knee-stops for a custom-fit restraint experience
- Master "dado" or "box joint" techniques for a clean, professional finish
- Add ergonomic padding to the chest rest for long-duration scenes
Whats Inside: Woodworking joinery guides, adjustment hardware tips, and ergonomic design measurements.
Perfect For: Hobbyists who want to practice their woodworking skills while building a unique piece of psychological restraint furniture.

Adjustable Stocks
Bring a touch of classic theater to your play space with our Adjustable Stocks. Whether you want a standalone floor unit or a table-top version, these plans provide the templates for a perfect, smooth fit. It’s a project that combines historical aesthetics with modern safety and comfort.
You Will Learn How To:
- Use templates to cut perfectly sized and smoothed neck and wrist openings
- Install a reliable hinge and locking mechanism for secure play
- Build a stable base that prevents the stocks from shifting
- Apply decorative stains and finishes for a truly "old-world" look
Whats Inside: Printable templates for cutouts, hardware installation guides, and decorative finishing ideas.
Perfect For: Creative builders who enjoy detailed woodworking and want to add a "performative" element to their dungeon.

Bondage Bed-Frame
Why settle for a normal bed when you can sleep on a masterpiece of restraint? This Bondage Bed-Frame replaces your flimsy standard frame with a heavy-duty wooden powerhouse. Featuring continuous tie-off rails, it’s a professional-grade tool disguised as everyday furniture.
You Will Learn How To:
- Construct an "over-built" frame that eliminates squeaks and shifts during play
- Integrate continuous steel or wooden rails for tie-off points at any angle
- Build a structure that supports a standard mattress for daily use
- Choose finishes that look like high-end bedroom furniture
Whats Inside: Structural blueprints, hardware lists for silent play, and rail installation guides.
Perfect For: Couples who want to integrate their kink into their lifestyle with furniture that is as functional as it is fun.

Fold-Down Wall Bench
Small space? No problem. The Fold-Down Wall Bench is the ultimate urban dungeon solution. It bolts securely to your wall and folds down like a Murphy bed when it's time to play. When it's up, it’s a mirror or a chalkboard; when it’s down, it’s a rock-solid impact bench.
You Will Learn How To:
- Locate wall studs and use heavy-duty lag bolts for a safe, secure mount
- Build a folding mechanism that handles the stresses of impact play
- Create a dual-purpose "false bottom" for mirrors or decorative panels
- Design a padded top that stays secure even when stored vertically
Whats Inside: Wall-mounting safety guides, folding hardware lists, and multi-purpose design ideas.
Perfect For: Apartment dwellers and those who need a professional play space that can vanish in seconds.

The Cripple Stool
Sometimes the simplest tools are the most effective. The "Cripple" Stool is a short, angled bench designed to encourage a specific, vulnerable posture for impact play. It’s a quick, high-reward project that provides a much better experience than any household stool ever could.
You Will Learn How To:
- Angle legs for maximum stability and a specific "posture" result
- Create a heavily padded, tilted seat for ergonomic comfort
- Construct a sturdy unit using minimal materials and tools
- Finish the stool for easy cleaning and long-term durability
Whats Inside: 3D diagrams, quick-build cutting lists, and padding/upholstery tips.
Perfect For: Beginners looking for a "weekend project" that immediately upgrades their impact play experience.

Hidden-Restraint Side Table
The ultimate in bedroom discretion. This Hidden-Restraint Side Table looks like a custom nightstand, but its reinforced legs and recessed D-rings tell a different story. It even includes a lockable drawer for your most private tools. It’s furniture-grade quality with a kinky heart.
You Will Learn How To:
- Build a "furniture-grade" nightstand with professional drawer slides
- Discretely install recessed D-ring anchor points into the frame
- Reinforce the legs to handle lateral tension during play
- Install a secure, locking mechanism for the storage drawer
Whats Inside: Detailed furniture blueprints, hidden hardware guides, and drawer construction steps.
Perfect For: The hobbyist woodworker who wants to practice advanced techniques while building a "stealth" bedroom piece.

Inversion/Incline Ladder
Vertical play opens up a whole new world of possibilities. Our Inversion Ladder is a versatile, leaning frame that provides dozens of attachment points at varying heights. From stretching to intense bondage, this ladder is the backbone of creative restraint play.
You Will Learn How To:
- Build a heavy-duty ladder with oversized, comfortable rungs
- Calculate the perfect safe angle for leaning against a wall or frame
- Install non-slip feet and wall-securing hardware for total safety
- Finish the wood to be smooth and comfortable for hands and feet
Whats Inside: Angle and safety calculations, material lists for oversized rungs, and versatile tie-off ideas.
Perfect For: Rope enthusiasts and fans of vertical bondage who want a multi-purpose tool for their play space.

Centipede Tie-Down Bench
For the rope lover who wants total precision, the "Centipede" Bench is a dream come true. With dozens of eye-bolts or slots along its perimeter, you can create intricate "spiderweb" bondage with ease. Built with a "torsion box" top, this bench stays perfectly flat under even the highest tension.
You Will Learn How To:
- Build a "torsion box" bench top that remains rigid and flat under pressure
- Install a high-density grid of anchor points for ultimate tie-off flexibility
- Create a long, narrow frame that allows access to the receiver from all sides
- Apply a finish that withstands the friction of ropes and straps
Whats Inside: Torsion box construction guides, anchor point layout templates, and rope-play safety tips.
Perfect For: Advanced rope practitioners and those who love the aesthetic of complex, precise bondage.

Modular Dungeon Cubes
Think of these as "LEGOs for your dungeon." Modular Dungeon Cubes are heavy-duty, reinforced crates that can be stacked, bolted, or used as stools. Whether you’re building a platform or a temporary bench, these cubes give you the power to reconfigure your space for every scene.
You Will Learn How To:
- Build reinforced wooden crates with internal bracing for massive weight support
- Install bolting systems to safely connect multiple cubes together
- Create multi-functional surfaces for sitting, kneeling, or standing
- Finish the cubes to look like professional, uniform dungeon equipment
Whats Inside: Modular design blueprints, internal bracing diagrams, and stacking safety guides.
Perfect For: People who love to experiment with different setups and need furniture as adaptable as their imagination.

The Padded Sawbuck
Beautiful, striking, and incredibly stable, the Padded Sawbuck is a visual masterpiece. The X-frame design provides unmatched lateral stability, while the V-shaped seat cradles the receiver securely. It looks like a high-end boutique piece, but our plans make it easy for any hobbyist to build.
You Will Learn How To:
- Master the "cross-lap" joint for an X-frame that is as strong as it is beautiful
- Construct a deep V-shaped "cradle" seat for secure positioning
- Apply thick padding and vinyl for a high-comfort, high-impact finish
- Build a piece with incredible lateral stability for intense scenes
Whats Inside: Joint-cutting guides, V-seat assembly steps, and professional upholstery tips.
Perfect For: Builders who want a visually stunning, high-stability piece that looks like it belongs in a professional dungeon.

``Centipede`` Tie-Down Bench
For the rope lover who wants total precision, the "Centipede" Bench is a dream come true. With dozens of eye-bolts or slots along its perimeter, you can create intricate "spiderweb" bondage with ease. Built with a "torsion box" top, this bench stays perfectly flat under even the highest tension.
You Will Learn How To:
- Build a "torsion box" bench top that remains rigid and flat under pressure
- Install a high-density grid of anchor points for ultimate tie-off flexibility
- Create a long, narrow frame that allows access to the receiver from all sides
- Apply a finish that withstands the friction of ropes and straps
Whats Inside: Torsion box construction guides, anchor point layout templates, and rope-play safety tips.
Perfect For: Advanced rope practitioners and those who love the aesthetic of complex, precise bondage.

Modular Dungeon Cubes
Think of these as "LEGOs for your dungeon." Modular Dungeon Cubes are heavy-duty, reinforced crates that can be stacked, bolted, or used as stools. Whether you’re building a platform or a temporary bench, these cubes give you the power to reconfigure your space for every scene.
You Will Learn How To:
- Build reinforced wooden crates with internal bracing for massive weight support
- Install bolting systems to safely connect multiple cubes together
- Create multi-functional surfaces for sitting, kneeling, or standing
- Finish the cubes to look like professional, uniform dungeon equipment
Whats Inside: Modular design blueprints, internal bracing diagrams, and stacking safety guides.
Perfect For: People who love to experiment with different setups and need furniture as adaptable as their imagination.
Planning and Preparation
Before picking up a saw or a drill, proper planning is essential. This phase goes beyond just choosing a design, it involves careful consideration of your available space, your technical skills, and the safety requirements inherent to BDSM furniture. A meticulously thought-out plan forms the backbone of a successful project, helping you avoid costly mistakes while ensuring that every component is purposefully designed.
Spend time sketching your ideas, measuring your space, and even creating rough 3D models using design software or simple cardboard prototypes. This hands-on preparation helps you visualize the final product, anticipate potential challenges, and refine your design for both form and function.
Safety Considerations
When building BDSM furniture, safety is paramount. Each piece of equipment is designed to support dynamic, physical activities; therefore, every joint and material must be robust and reliable. Keep these safety tips in mind:
- Structural Integrity: Reinforce every joint with quality fasteners and, where possible, metal brackets. Ensure that all load-bearing components are engineered to handle significant stress.
- High-Quality Materials: Use premium wood, metal, and upholstery materials. Lower-quality supplies may save money initially but can compromise safety and longevity.
- Accurate Measurements: Precision in measurements guarantees that each component fits perfectly. A slight miscalculation can lead to instability or uneven weight distribution.
- Proper Tool Use: Always follow safety guidelines for power tools. Equip yourself with protective gear such as goggles, gloves, and ear protection.
- Gradual Load Testing: After assembly, test your furniture gradually. Start with light pressure to ensure that every component performs as expected before using it in full play sessions.
Design and Measurements
Every DIY project starts with a vision. Your design should reflect your personal style while also meeting the practical requirements of BDSM play. Here are key factors to consider during the design phase:
- Space Considerations: Measure the area where your furniture will be placed. Ensure that the final product fits comfortably without overcrowding your room or play area.
- Functional Design: Consider the types of activities you want to facilitate. For example, the angles, heights, and supports on a spanking bench should be optimized for both comfort and accessibility.
- Aesthetic Appeal: The design should be visually striking. Whether you opt for a classic, industrial, or avant-garde look, the final product should resonate with your personal style.
- Ergonomic Factors: Ensure that your design provides adequate support and comfort to reduce the risk of strain or injury during extended sessions.
Invest time in drawing detailed blueprints and revising your plans. This initial work will pay dividends during construction, as it minimizes surprises and ensures that every piece fits perfectly into your envisioned layout.
Essential Tools and Materials for DIY BDSM Furniture
Gathering the right tools and materials is crucial for any DIY project. The following list covers the essentials needed to complete your BDSM furniture projects:
- Tools:
- Circular saw or table saw
- Power drill with various drill bits
- Screwdrivers (both flat-head and Phillips)
- Measuring tape, level, and square
- Clamps and a sturdy workbench
- Sanding machine or assorted sandpapers
- Paintbrushes or spray paint equipment
- Protective gear: goggles, gloves, and ear protection
- Materials:
- High-quality wood or plywood (for a sturdy frame)
- Metal brackets, screws, and bolts
- High-density upholstery foam
- Durable fabric or leather for covering
- Wood stain, paint, or varnish
- Adhesives and various fasteners
- Optional decorative accents for customization
Choosing quality tools and materials is not just about durability, it also affects the overall look and performance of your final product. If you’re new to woodworking or upholstery, consider seeking advice from local hardware stores or online tutorials to make informed choices.
DIY Guide: Building Your Own St. Andrew’s Cross
The St. Andrew’s Cross is an iconic piece in BDSM culture, symbolizing both restraint and freedom. Often used for various forms of impact play and bondage, this cross is a favorite among enthusiasts for its robust design and timeless appeal. Follow this step-by-step guide to construct a cross that is as safe as it is stylish.
Materials Required
- 2×4 inch lumber or high-quality plywood for the frame
- Metal corner brackets for reinforcement
- Wood screws (ranging from 1.5-inch to 3-inch lengths)
- Sandpaper or an electric sander
- Wood stain or paint in your chosen color
- Clear protective sealant
- Measuring tape, carpenter’s square, and level
- Optional: Padded leather or fabric for added comfort and decorative detail
Step-by-Step Instructions for St. Andrew’s Cross
- Design and Measurement: Sketch your design and decide on dimensions that suit your space. A common size for a St. Andrew’s Cross is approximately 6 feet tall by 3 feet wide, though you may adjust these dimensions based on your needs.
- Cutting the Wood: Using a circular or table saw, cut the wood into the required pieces. You will need two long vertical supports and several horizontal crossbars. Ensure that the intersections allow for sufficient overlap to maximize stability.
- Sanding and Smoothing: Sand all the wood pieces thoroughly to remove any rough edges or splinters. A smooth finish is critical for both safety and the final aesthetic.
- Assembly: Lay the vertical supports on a flat surface, and then position the horizontal crossbars. Secure each intersection with metal brackets and wood screws. Double-check that each joint is perfectly aligned using a level.
- Finishing Touches: Apply your chosen wood stain or paint to enhance the natural beauty of the wood. Once the color dries, add a layer of clear sealant to protect against wear, moisture, and frequent use.
- Optional Upholstery: If desired, add padding by affixing leather or fabric to key areas. This not only improves comfort during use but also adds a touch of luxury to your design.
- Inspection and Testing: Conduct a thorough inspection of your assembled cross. Test each joint and reinforcement by gradually applying weight and pressure to ensure that the structure is safe for use.
The St. Andrew’s Cross is more than a piece of furniture, it’s a symbol of trust, control, and artistic expression. Take your time through every step to ensure that the final product is both durable and visually appealing.
DIY Guide: Constructing a Spanking Bench
The Spanking Bench is a versatile piece designed specifically for impact play. Its design focuses on providing a secure and comfortable platform while allowing for multiple positions and angles. This guide will walk you through constructing a bench that is both sturdy and visually appealing.
Materials Required for a Spanking Bench
- Sturdy plywood or solid wood boards (minimum 3/4 inch thick)
- Metal frame supports or wooden braces
- Wood screws and bolts
- High-density foam padding
- Durable upholstery fabric or leather
- Wood stain, paint, or varnish for finishing
- Basic carpentry tools (saw, drill, screwdriver)
- Measuring tape, level, and square
Step-by-Step Instructions for the Spanking Bench
- Design Your Bench: Begin with a sketch of your desired bench. A typical spanking bench is designed with an angled surface to allow for ergonomic positioning during play. Consider dimensions that offer stability without sacrificing comfort.
- Cutting and Shaping the Base: Cut your plywood or wood boards according to your design. Ensure that the base includes a raised section for leaning and a lower section that accommodates various positions.
- Reinforcing the Structure: Attach metal supports or wooden braces at strategic points under the base to reinforce the structure. These supports are crucial for maintaining stability under dynamic loads.
- Adding Padding and Upholstery: Measure and cut high-density foam to match the contours of your bench. Secure the foam with a strong adhesive, then cover it with your choice of upholstery material. Stretch the fabric evenly and secure it using a staple gun or upholstery tacks for a clean finish.
- Finishing Touches: Apply a protective finish, such as wood stain, paint, or varnish, to all exposed wood surfaces. This not only enhances the bench’s appearance but also protects it from moisture and wear.
- Safety Testing: Before using the bench, perform a series of tests to ensure that it can support the intended activities. Check for any wobbling or weak joints and reinforce as necessary.
When constructing your spanking bench, focus on creating a piece that balances practicality with a sleek design. The right angle and proper cushioning can make all the difference in comfort and safety during use.
DIY Guide: Creating a BDSM Cage
The BDSM Cage is an ambitious project that offers versatility for various kink activities, from confinement to immersive role-play environments. This guide provides instructions on building a secure, durable cage that doesn’t compromise on style.
Materials Required for a BDSM Cage
- Sturdy wooden beams or metal pipes (depending on your design preference)
- Heavy-duty hinges and secure locking mechanisms
- Mesh panels or solid boards for the walls
- Wood screws, bolts, and reinforcement brackets
- Weatherproof paint or metal finish
- Basic tools: saw, drill, measuring tape, and level
- Optional: Padded interior elements or custom upholstery for added comfort
Step-by-Step Instructions for the BDSM Cage
- Conceptualize Your Design: Begin by outlining your cage’s design. Consider the dimensions, door placements, and wall configurations that will suit your intended activities. A well-thought-out floor plan is essential for ensuring both functionality and safety.
- Building the Frame: Cut and assemble your wooden beams or metal pipes to form the frame. Secure each joint using heavy-duty brackets and bolts. If you opt for a wooden frame, pre-drill the screw holes to prevent splitting and reinforce with additional corner brackets where needed.
- Installing the Walls: Attach mesh panels or solid boards to form the walls of the cage. Ensure that each panel is securely fastened to the frame. Extra screws or bolts at each corner add a layer of security that is critical for a structure meant for intensive use.
- Adding Doors and Locks: Install one or more doors using heavy-duty hinges. The locking mechanisms should be robust, allowing for both secure confinement and quick release in emergencies. Test each lock several times to ensure reliability.
- Finishing and Customization: Apply weatherproof paint or a specialized metal finish to protect the exterior of your cage from moisture and wear. For added comfort, consider installing padded interiors or custom upholstery in select areas.
- Inspection and Load Testing: Conduct a comprehensive inspection of the assembled cage. Apply gradual pressure and test the locking mechanisms and hinges to verify that every component meets safety standards.
Building a BDSM Cage is a challenging yet rewarding project. The final product should not only be secure and durable but also an aesthetically striking addition to your play space. Combining materials like wood and metal can yield an industrial yet warm look, tailored to your unique style.
Customization and Finishing Touches
Once the basic structure of your BDSM furniture is complete, the next phase is to make it uniquely yours. Customization goes beyond aesthetics, it’s about tailoring every detail to enhance functionality, comfort, and visual appeal.
Upholstery and Padding Options
High-quality upholstery and padding are essential for creating furniture that is both safe and comfortable. Consider the following options:
- Leather vs. Fabric: Leather provides a classic, luxurious feel and is relatively easy to clean. Durable fabrics offer versatility with colors and textures, allowing you to match your decor.
- High-Density Foam: Using high-density foam ensures that your piece maintains its shape and offers firm support even during extended sessions.
- Modular Designs: Removable covers or modular padding systems are practical for maintenance and allow you to update your design without reconstructing the entire piece.
- Secure Attachment: Use industrial adhesives or reinforced stitching to ensure that the upholstery remains securely in place over time.
Decorative Accents and Functional Additions
Personalizing your BDSM furniture can transform it into a signature statement piece. Consider adding these enhancements:
- Carved Wood Details: Incorporate intricate carvings or engraved motifs that echo themes from BDSM and fetish art.
- Integrated Restraints: Seamlessly include built-in cuffs, shackles, or anchor points that complement the overall design while remaining functional.
- Ambient Lighting: Soft LED lighting integrated into the structure can set the mood and highlight the craftsmanship of your piece.
- Contrasting Finishes: Experiment with a mix of matte and gloss finishes to create a visually dynamic surface that draws the eye.
Tips for Maintaining and Upgrading Your DIY BDSM Furniture
Keeping your custom-built furniture in peak condition is as important as the construction process itself. Regular maintenance not only extends the lifespan of your pieces but also ensures continued safety and performance. Consider these maintenance tips:
- Regular Inspections: Frequently check for any loose screws, worn upholstery, or weakened joints. Addressing small issues early can prevent major repairs later.
- Cleaning and Care: Use cleaning products that are compatible with your materials. Leather may benefit from specialized conditioners, while wooden surfaces might require periodic re-staining or sealing.
- Component Upgrades: As your needs evolve, don’t hesitate to upgrade parts of your furniture. Whether it’s installing more secure locking mechanisms or refreshing the padding, these improvements can enhance both functionality and safety.
- Documentation: Keep detailed records of your projects, including design sketches, materials used, and any modifications made. This documentation is invaluable for future upgrades or repairs.
- Safety Rechecks: After any upgrade or repair, retest the equipment to ensure it maintains the structural integrity required for safe use.
Maintaining your DIY creations is an ongoing process that reflects the care and passion you’ve invested in them. Regular upkeep not only preserves their aesthetic appeal but also provides peace of mind during use.
Download Free BDSM Furniture Building Plans
St Andrews Cross Furniture Plans
Spanking Chest Furniture Plans
Frequently Asked Questions about BDSM Furniture Building Plans
What are the most important safety considerations?
Safety starts with using high-quality materials and following precise measurements. Reinforce all load-bearing joints with brackets and additional fasteners, and always test your construction gradually. A well-planned design minimizes risks during intense activities.
How do I choose the right materials?
Your choice of materials should balance durability, aesthetics, and comfort. Premium wood and metal hardware offer long-lasting strength, while upholstery materials such as leather or heavy-duty fabric provide both comfort and visual appeal. Consider environmental factors and the intended use when selecting finishes and adhesives.
Can I customize the design to fit my space?
Absolutely. DIY projects allow you to tailor every aspect, from dimensions and angles to finishes and decorative details. Adjust your design to ensure that the furniture integrates seamlessly with your play area and meets your functional needs.
How long does it typically take to build these pieces?
The time required depends on the complexity of your design and your experience level. A straightforward St. Andrew’s Cross might be completed over a weekend, while more intricate projects like a BDSM Cage or a fully upholstered Spanking Bench could take several weekends. Always plan for extra time for finishing touches and safety inspections.
Are there any risks involved in DIY BDSM furniture building?
Every DIY project carries some risk, but these can be minimized by adhering to strict safety protocols, using high-quality materials, and carefully testing your work. If you’re ever in doubt, seek advice from experienced builders or professionals.
Is advanced carpentry expertise required?
Not necessarily. Many of these designs can be adapted for beginners, and numerous online resources are available to help you through each step. Start with simpler projects to build your confidence before progressing to more complex builds.
What should I do if I encounter a structural problem?
If you notice a structural issue, such as misaligned joints or instability, pause your work and review your design. It may be necessary to add extra supports or remeasure your components. Safety should always come first.
Where can I find additional resources and support?
Online communities, DIY blogs, and video tutorials are excellent sources of information and support. Engaging with others who share your passion can provide you with creative ideas and practical advice.
Resources and Further Reading
For those eager to dive even deeper into the world of DIY BDSM furniture and related projects, the following resources are highly recommended:
- Online Communities: Join forums and social media groups dedicated to BDSM and DIY projects. These platforms offer real-world advice, project inspiration, and a supportive network of like-minded individuals.
- Tutorial Videos: YouTube and other video-sharing platforms host a variety of step-by-step guides on woodworking, upholstery, and specialized DIY projects tailored for BDSM settings.
- DIY Blogs and Websites: Explore blogs that focus on modern carpentry, furniture design, and fetish art. These sites provide detailed tutorials, design ideas, and troubleshooting tips.
- Workshops and Courses: Consider enrolling in local or online courses in carpentry, metalwork, or upholstery to refine your skills and gain hands-on experience.
- Books and Magazines: Publications on home improvement and specialized DIY projects can offer advanced techniques and inspire creative approaches to your builds.
Expanding your knowledge through these resources will not only enhance your current projects but also inspire new ideas for future creations. Embrace the continuous learning process that comes with DIY craftsmanship, and let each project be a stepping stone to even greater innovation.
Inspiration and Next Steps
Embarking on a DIY BDSM furniture project is an exciting journey that allows you to express your individuality while enhancing your play space. With careful planning, quality materials, and a focus on safety, you can create pieces that are both functional and visually compelling. Whether you’re drawn to the timeless appeal of a St. Andrew’s Cross, the versatile design of a Spanking Bench, or the bold statement of a BDSM Cage, each project is an opportunity to push creative boundaries and develop your skills.
Every successful DIY project is built on a foundation of research, patience, and experimentation. As you gain experience, you’ll discover that your designs evolve, integrating advanced techniques, innovative materials, and personal touches that set your creations apart. Use this guide as a launching pad for your next project, and don’t be afraid to experiment with new ideas and configurations.
Let your play space reflect your unique style and passion. Mix textures, colors, and finishes to craft an environment that is as stimulating as it is safe. With every cut, screw, and brushstroke, you’re not just building furniture, you’re building a space that celebrates creativity, empowerment, and the art of BDSM.
Embrace the challenges and celebrate the successes. Your DIY journey in BDSM furniture building is a testament to your creativity, technical skill, and dedication to crafting an environment that is uniquely yours. Now, it’s time to gather your tools, review your plans, and start building your vision, one measured cut at a time.
Explore Our Collection of Easy to Follow BDSM Furniture Plans
Adjustable BDSM Spanking Bench Plans
Ready to stop improvising spanking furniture and build something that can actually handle your scenes? These Adjustable BDSM Spanking Bench Plans show you exactly how to create a sturdy, custom bench for your play space.
You Will Learn How To:
- Build a stable safe bench for spanking and impact play
- Cut, assemble and adjust the frame with clear, simple steps
- Add anchor points, padding and finishes that fit your style
Whats Inside: step by step build instructions, tool and materials lists, diagrams, safety tips and ideas for padding and finishes that suit your kink.
Perfect For: couples and kink fans who want real bondage furniture, built to their own size, budget and fantasies.
BDSM Table Pillory Plans
Want a proper pillory without bolting hardware into your dining table forever? These BDSM Table Pillory Plans show you how to build a solid, removable pillory top that clamps to your table, then hides away when guests arrive.
You Will Learn How To:
- Build a stable pillory that sits securely on a table
- Cut and assemble the frame using clear, simple steps
- Add adjustable neck and wrist openings, padding and finishing touches
Whats Inside: full DIY blueprint, cut lists, tool and materials lists, step by step diagrams, safety tips and ideas for lining, padding and dungeon worthy finishes.
Perfect For: kinky couples and creators who want serious bondage furniture, no permanent drilling and a play space that looks as intense as it feels.
BDSM Straddling Spank Bench Plans
Ready to stop improvising spanking positions on beds and chairs These BDSM Straddling Spank Bench Plans show you how to build a solid, straddle friendly bench that actually fits your scenes.
You Will Learn How To:
- Build a stable straddling bench for spanking and impact play
- Cut and assemble the frame with clear, simple steps
- Add anchor points, padding and finishes that suit your style
Whats Inside: step by step build instructions, tool and materials lists, cut diagrams, safety checks and ideas for upholstery and dungeon worthy finishes.
Perfect For: kinky makers and couples who want serious spanking furniture, built to their own size, room and fantasies.
Padded St. Andrew’s Cross
Stop dreaming of the ultimate dungeon centerpiece and start building it. The St. Andrew’s Cross is the iconic symbol of authority and surrender, and these plans show you how to create a professional-grade, foldable version that fits your home perfectly. No more worrying about stability, build a frame that handles every scene with confidence.
You Will Learn How To:
- Construct a rock-solid X-frame using 4x4 timber for maximum stability
- Install a heavy-duty folding mechanism for easy storage when not in use
- Apply high-density foam and marine-grade vinyl for a premium, easy-to-clean finish
- Position heavy-duty eyelets for secure and versatile limb restraint
Whats Inside: Detailed blueprints, a comprehensive timber and hardware list, step-by-step assembly guides, and professional upholstery tips for a high-end look.
Perfect For: Dedicated kinksters who want a classic, imposing piece of furniture that can be tucked away when the scene is over.
Bondage Sawhorse
Elegant in its simplicity and unmatched in its versatility, the Bondage Sawhorse is the "Swiss Army Knife" of kink furniture. These plans guide you through building a sturdy, trestle-style seat that looks like a professional piece of kit but can be built with basic tools and standard lumber.
You Will Learn How To:
- Create a wide-base frame that guarantees zero-wobble during play
- Pad the "spine" of the horse for long-term comfort during scenes
- Install D-ring anchor points for secure under-the-body tie-offs
- Master basic carpentry joints for a sleek, professional aesthetic
Whats Inside: Beginner-friendly diagrams, a standard lumber shopping list, and creative ideas for custom tie-off configurations.
Perfect For: Hobbyists looking for their first major build that offers endless possibilities for bondage and restraint.
Pelvic Sling Frame
Experience the weightless sensation of a sling without ever having to drill a hole in your ceiling. This freestanding Pelvic Sling Frame uses a reinforced "portal" design to provide a rock-solid foundation for suspension play. It’s the ultimate way to bring dynamic, weight-bearing play into your home safely.
You Will Learn How To:
- Engineer a "portal" frame with reinforced corners for dynamic weight capacity
- Determine the perfect height for versatile suspension and activity
- Assemble a freestanding unit that doesn't require permanent wall or ceiling mounts
- Choose the right hardware to support heavy-duty slings and straps
Whats Inside: Load-bearing construction tips, hardware specifications, safety-first assembly steps, and adjustment guides.
Perfect For: Renters or homeowners who want the thrill of suspension play with the freedom of a portable, freestanding unit.
The M Frame
Designed for the art of surrender, the "M" Frame provides a stable, comfortable leaning point for flogging and sensation play. Forget the hazards of leaning over unstable sofas or tables, this frame is built to keep the receiver perfectly positioned and the donor in total control.
You Will Learn How To:
- Assemble the signature "M" silhouette for ergonomic forward-leaning play
- Use wing-nut hardware to make the frame fully portable and easy to store
- Ensure maximum stability for spread-leg positioning
- Finish the central bar for comfort and safety during long scenes
Whats Inside: Step-by-step instructions, a portability hardware guide, and safety tips for forward-leaning restraint.
Perfect For: Fans of flogging and sensation play who need a stable, portable frame that can travel wherever the scene takes them.
Padded Bondage Ottoman
Master the art of "Stealth Kink" with a piece of furniture that hides its true purpose in plain sight. This Padded Bondage Ottoman looks like a high-end living room piece but features hidden anchor points and toy storage. It’s the perfect solution for the kinkster who values discretion without sacrificing functionality.
You Will Learn How To:
- Construct a heavy-duty plywood box frame that doubles as a sturdy seat
- Install discrete "pop-up" or hidden anchor points for restraints
- Build a hollow interior for secure, out-of-sight toy storage
- Apply professional upholstery techniques for a "store-bought" look
Whats Inside: Stealth design blueprints, upholstery guides, hardware hiding tips, and storage compartment plans.
Perfect For: Beginners who want a fully functional dungeon piece that can live in their living room without raising an eyebrow.
Spanking Chair Insert
Turn any sturdy dining chair into a professional spanking station in seconds. This clever Spanking Chair Insert is the ultimate space-saver, providing a raised, angled platform and integrated wrist restraints without the need for a full-sized bench. High utility meets low footprint.
You Will Learn How To:
- Build a custom-fit platform that secures safely to standard chairs
- Create an angled "booster" for the perfect impact play positioning
- Integrate adjustable locking arms and wrist restraint points
- Finish the wood and padding for comfort and hygiene
Whats Inside: Scaling guides for different chair sizes, assembly diagrams, and padding instructions.
Perfect For: Urban dwellers or those with limited space who want a professional play experience on a budget.
High-Back Restraint Chair
Make a statement with a High-Back Restraint Chair that functions as both a stunning centerpiece and a formidable tool of control. This modern take on a classic design features integrated strap slots and an angled seat for total security. It’s where form meets absolute function.
You Will Learn How To:
- Cut and assemble a tall backrest with precision slots for restraint straps
- Build a wide, anti-tip base using thick plywood panels
- Engineer an angled seat to keep the receiver securely in place
- Sand and finish the piece for a high-end, "boutique" dungeon aesthetic
Whats Inside: Full-scale templates for strap slots, structural bracing guides, and finishing tips for a professional look.
Perfect For: Builders who want a visually striking piece of furniture that commands attention and offers total restraint.
Freestanding Suspension Beam
Want a proper pillory without bolting hardware into your dining table forever? These BDSM Table Pillory Plans show you how to build a solid, removable pillory top that clamps to your table, then hides away when guests arrive.
You Will Learn How To:
- Build a stable pillory that sits securely on a table
- Cut and assemble the frame using clear, simple steps
- Add adjustable neck and wrist openings, padding and finishing touches
Whats Inside: full DIY blueprint, cut lists, tool and materials lists, step by step diagrams, safety tips and ideas for lining, padding and dungeon worthy finishes.
Perfect For: kinky couples and creators who want serious bondage furniture, no permanent drilling and a play space that looks as intense as it feels.
Floor Piercing Bench
Master the art of floor-based play with a bench designed for total stability and safety. The Floor Piercing Bench sits low to the ground, providing the dominant partner with total control and the receiver with a rock-solid, grounded experience. It’s the safest "starter" piece for any new builder.
You Will Learn How To:
- Build an ultra-wide, stable base with a low center of gravity
- Create a minimalist padded top designed for comfort and accessibility
- Ensure the frame can handle intense impact without shifting
- Apply finishes that are durable and easy to sanitize
Whats Inside: Simple assembly diagrams, material lists, and tips for "low-profile" padding techniques.
Perfect For: Beginners who want to build their first piece of play furniture with total confidence in its strength and safety.
The Kneeling Prayer Box
Explore the psychology of fixed positions with The Kneeling "Prayer" Box. This piece is designed to hold the receiver in a deep, submissive kneel, resting their weight on a padded top. It’s an architectural masterpiece that challenges the body and the mind in equal measure.
You Will Learn How To:
- Construct a reinforced three-sided box with precision joints
- Build adjustable knee-stops for a custom-fit restraint experience
- Master "dado" or "box joint" techniques for a clean, professional finish
- Add ergonomic padding to the chest rest for long-duration scenes
Whats Inside: Woodworking joinery guides, adjustment hardware tips, and ergonomic design measurements.
Perfect For: Hobbyists who want to practice their woodworking skills while building a unique piece of psychological restraint furniture.
Adjustable Stocks
Bring a touch of classic theater to your play space with our Adjustable Stocks. Whether you want a standalone floor unit or a table-top version, these plans provide the templates for a perfect, smooth fit. It’s a project that combines historical aesthetics with modern safety and comfort.
You Will Learn How To:
- Use templates to cut perfectly sized and smoothed neck and wrist openings
- Install a reliable hinge and locking mechanism for secure play
- Build a stable base that prevents the stocks from shifting
- Apply decorative stains and finishes for a truly "old-world" look
Whats Inside: Printable templates for cutouts, hardware installation guides, and decorative finishing ideas.
Perfect For: Creative builders who enjoy detailed woodworking and want to add a "performative" element to their dungeon.
Bondage Bed-Frame
Why settle for a normal bed when you can sleep on a masterpiece of restraint? This Bondage Bed-Frame replaces your flimsy standard frame with a heavy-duty wooden powerhouse. Featuring continuous tie-off rails, it’s a professional-grade tool disguised as everyday furniture.
You Will Learn How To:
- Construct an "over-built" frame that eliminates squeaks and shifts during play
- Integrate continuous steel or wooden rails for tie-off points at any angle
- Build a structure that supports a standard mattress for daily use
- Choose finishes that look like high-end bedroom furniture
Whats Inside: Structural blueprints, hardware lists for silent play, and rail installation guides.
Perfect For: Couples who want to integrate their kink into their lifestyle with furniture that is as functional as it is fun.
Fold-Down Wall Bench
Small space? No problem. The Fold-Down Wall Bench is the ultimate urban dungeon solution. It bolts securely to your wall and folds down like a Murphy bed when it's time to play. When it's up, it’s a mirror or a chalkboard; when it’s down, it’s a rock-solid impact bench.
You Will Learn How To:
- Locate wall studs and use heavy-duty lag bolts for a safe, secure mount
- Build a folding mechanism that handles the stresses of impact play
- Create a dual-purpose "false bottom" for mirrors or decorative panels
- Design a padded top that stays secure even when stored vertically
Whats Inside: Wall-mounting safety guides, folding hardware lists, and multi-purpose design ideas.
Perfect For: Apartment dwellers and those who need a professional play space that can vanish in seconds.
The Cripple Stool
Sometimes the simplest tools are the most effective. The "Cripple" Stool is a short, angled bench designed to encourage a specific, vulnerable posture for impact play. It’s a quick, high-reward project that provides a much better experience than any household stool ever could.
You Will Learn How To:
- Angle legs for maximum stability and a specific "posture" result
- Create a heavily padded, tilted seat for ergonomic comfort
- Construct a sturdy unit using minimal materials and tools
- Finish the stool for easy cleaning and long-term durability
Whats Inside: 3D diagrams, quick-build cutting lists, and padding/upholstery tips.
Perfect For: Beginners looking for a "weekend project" that immediately upgrades their impact play experience.
Hidden-Restraint Side Table
The ultimate in bedroom discretion. This Hidden-Restraint Side Table looks like a custom nightstand, but its reinforced legs and recessed D-rings tell a different story. It even includes a lockable drawer for your most private tools. It’s furniture-grade quality with a kinky heart.
You Will Learn How To:
- Build a "furniture-grade" nightstand with professional drawer slides
- Discretely install recessed D-ring anchor points into the frame
- Reinforce the legs to handle lateral tension during play
- Install a secure, locking mechanism for the storage drawer
Whats Inside: Detailed furniture blueprints, hidden hardware guides, and drawer construction steps.
Perfect For: The hobbyist woodworker who wants to practice advanced techniques while building a "stealth" bedroom piece.
Inversion/Incline Ladder
Vertical play opens up a whole new world of possibilities. Our Inversion Ladder is a versatile, leaning frame that provides dozens of attachment points at varying heights. From stretching to intense bondage, this ladder is the backbone of creative restraint play.
You Will Learn How To:
- Build a heavy-duty ladder with oversized, comfortable rungs
- Calculate the perfect safe angle for leaning against a wall or frame
- Install non-slip feet and wall-securing hardware for total safety
- Finish the wood to be smooth and comfortable for hands and feet
Whats Inside: Angle and safety calculations, material lists for oversized rungs, and versatile tie-off ideas.
Perfect For: Rope enthusiasts and fans of vertical bondage who want a multi-purpose tool for their play space.
Centipede Tie-Down Bench
For the rope lover who wants total precision, the "Centipede" Bench is a dream come true. With dozens of eye-bolts or slots along its perimeter, you can create intricate "spiderweb" bondage with ease. Built with a "torsion box" top, this bench stays perfectly flat under even the highest tension.
You Will Learn How To:
- Build a "torsion box" bench top that remains rigid and flat under pressure
- Install a high-density grid of anchor points for ultimate tie-off flexibility
- Create a long, narrow frame that allows access to the receiver from all sides
- Apply a finish that withstands the friction of ropes and straps
Whats Inside: Torsion box construction guides, anchor point layout templates, and rope-play safety tips.
Perfect For: Advanced rope practitioners and those who love the aesthetic of complex, precise bondage.
Modular Dungeon Cubes
Think of these as "LEGOs for your dungeon." Modular Dungeon Cubes are heavy-duty, reinforced crates that can be stacked, bolted, or used as stools. Whether you’re building a platform or a temporary bench, these cubes give you the power to reconfigure your space for every scene.
You Will Learn How To:
- Build reinforced wooden crates with internal bracing for massive weight support
- Install bolting systems to safely connect multiple cubes together
- Create multi-functional surfaces for sitting, kneeling, or standing
- Finish the cubes to look like professional, uniform dungeon equipment
Whats Inside: Modular design blueprints, internal bracing diagrams, and stacking safety guides.
Perfect For: People who love to experiment with different setups and need furniture as adaptable as their imagination.
The Padded Sawbuck
Beautiful, striking, and incredibly stable, the Padded Sawbuck is a visual masterpiece. The X-frame design provides unmatched lateral stability, while the V-shaped seat cradles the receiver securely. It looks like a high-end boutique piece, but our plans make it easy for any hobbyist to build.
You Will Learn How To:
- Master the "cross-lap" joint for an X-frame that is as strong as it is beautiful
- Construct a deep V-shaped "cradle" seat for secure positioning
- Apply thick padding and vinyl for a high-comfort, high-impact finish
- Build a piece with incredible lateral stability for intense scenes
Whats Inside: Joint-cutting guides, V-seat assembly steps, and professional upholstery tips.
Perfect For: Builders who want a visually stunning, high-stability piece that looks like it belongs in a professional dungeon.
``Centipede`` Tie-Down Bench
For the rope lover who wants total precision, the "Centipede" Bench is a dream come true. With dozens of eye-bolts or slots along its perimeter, you can create intricate "spiderweb" bondage with ease. Built with a "torsion box" top, this bench stays perfectly flat under even the highest tension.
You Will Learn How To:
- Build a "torsion box" bench top that remains rigid and flat under pressure
- Install a high-density grid of anchor points for ultimate tie-off flexibility
- Create a long, narrow frame that allows access to the receiver from all sides
- Apply a finish that withstands the friction of ropes and straps
Whats Inside: Torsion box construction guides, anchor point layout templates, and rope-play safety tips.
Perfect For: Advanced rope practitioners and those who love the aesthetic of complex, precise bondage.
Modular Dungeon Cubes
Think of these as "LEGOs for your dungeon." Modular Dungeon Cubes are heavy-duty, reinforced crates that can be stacked, bolted, or used as stools. Whether you’re building a platform or a temporary bench, these cubes give you the power to reconfigure your space for every scene.
You Will Learn How To:
- Build reinforced wooden crates with internal bracing for massive weight support
- Install bolting systems to safely connect multiple cubes together
- Create multi-functional surfaces for sitting, kneeling, or standing
- Finish the cubes to look like professional, uniform dungeon equipment
Whats Inside: Modular design blueprints, internal bracing diagrams, and stacking safety guides.
Perfect For: People who love to experiment with different setups and need furniture as adaptable as their imagination.
Oh and... If you're looking for something different, check out the BDSM furniture created by Sensory London. The restore antiques and turn them into beautiful BDSM furniture masterpieces.